

What Happens When You Do Not Upload A File In Time On Examsoft
Your examination answer file should upload automatically once you have submitted your exam. You will receive feedback from the Examplify application that will advise you lot when this has completed.
You will too receive an Answer File Upload Confirmation electronic mail when your answer file has successfully uploaded. This email will besides explain that the video proctoring file may nonetheless be in progress. A separate confirmation email will exist sent to signal the successful upload of your video proctoring file.
If your video proctoring file has not been uploaded within 24 hours of your exam, you will receive an upload reminder email. Yous will continue to receive this email until the file has been uploaded.
In usual circumstances, an exam could take v–15 minutes to upload—that is the respond file and the remote invigilation (supervision) recording file. Anyone with a slow internet connection could find their exam takes up to three hours to upload.
If something seems to be wrong, please bank check the following:
- Your device is connected to the internet. If you are unable to obtain an net connection after completing an test, restart your device. After the restart, open up Examplify and you volition be prompted to retry uploading the exam files.
- Sure networks may prevent the exam answer file from uploading. In these cases, it would exist all-time to connect to a unlike network (including mobile hotspots) or perform a transmission upload of the answer file using the instructions listed in the next section.
- If a specific error bulletin is displayed when attempting to upload your respond file, such as "Something unexpected happened", or "answer bundle does not adhere to the right format", delight contact AskOtago.
Manual uploads tin be undertaken for both Windows and macOs computers. If Examplify is unable to upload your reply file automatically afterwards an examination, you lot can notice and upload the file using the Examsoft website instead. Delight note that you will demand to use the same computer that was used to complete the exam. Run across the instructions below for Windows and macOS:
Transmission upload instructions if you are using a Windows computer
- Log in to your Otago Examsoft portal
- Select Courses or History from the ExamSoft banner at the top of the page.
- Click the Manual exam upload button, then click Scan.
- In the File Explorer window, navigate to this folder:
C:\ProgramData\Examplify\STBackupsYou tin can do this by copying and pasting the folder path into the address bar in File Explorer as shown below: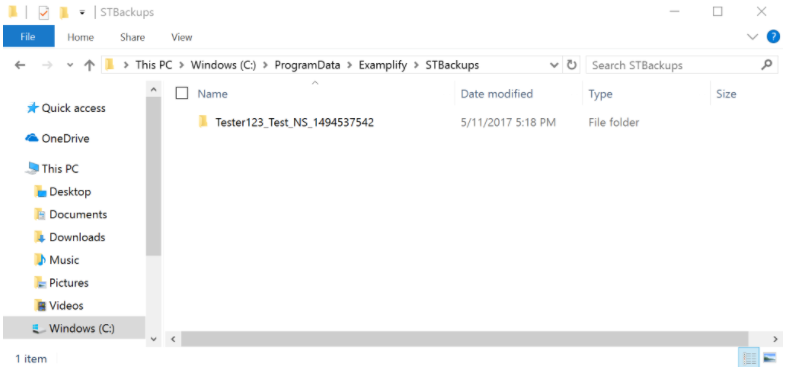
- Select the folder labelled with your student ID followed by the name of the test you lot are trying to submit answers for.
- Select the
*.xmslfile in this folder and click Open up.
- Click Upload to submit the respond file.
If you are unable to locate the answer file inside the STBackups folder, please be sure to check the post-obit folder path for non-uploaded answer files: C:\ProgramData\Examplify\Client ID\Student ID\AnswerBundle\Exam Posting ID .
The Client ID is by and large 3 to four digits. The Exam Posting ID will be six digits.
Manual upload instructions if you lot are using a macOS X computer
- Log in to your Otago Examsoft portal
- Select Courses or History from the ExamSoft banner at the top of the page.
- Click the Manual exam upload button, then click Browse.
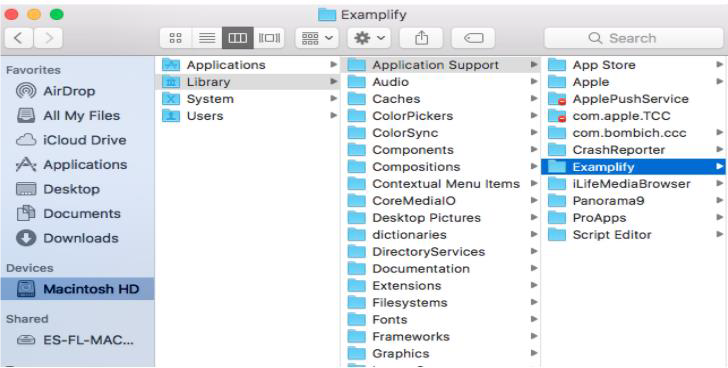
- In the Finder window, navigate to this binder:
/Library/Awarding Support/Examplify
Yous tin practise this past pressing the Shift + ⌘ + G keys at the same time, and then copy and paste the folder path into the prompt every bit shown below, then clicking Go.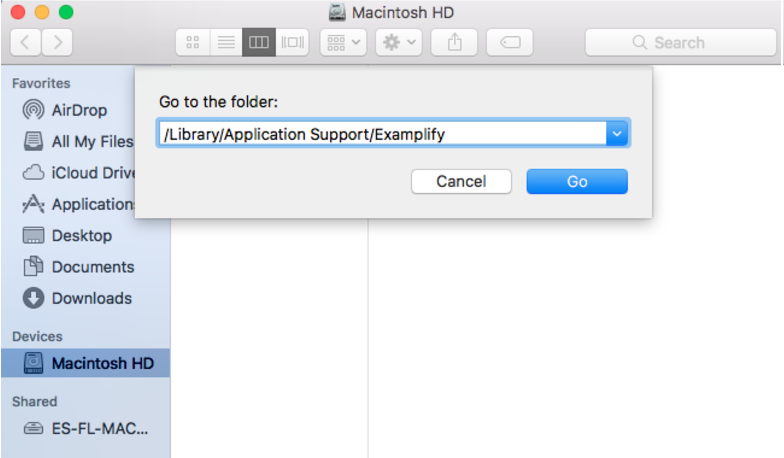
- Discover and open the folder named
STBackups. - Select the folder labelled with your pupil ID followed by the proper noun of the test you are trying to submit answers for.
- Locate the respond file with the extension
*.xmsl.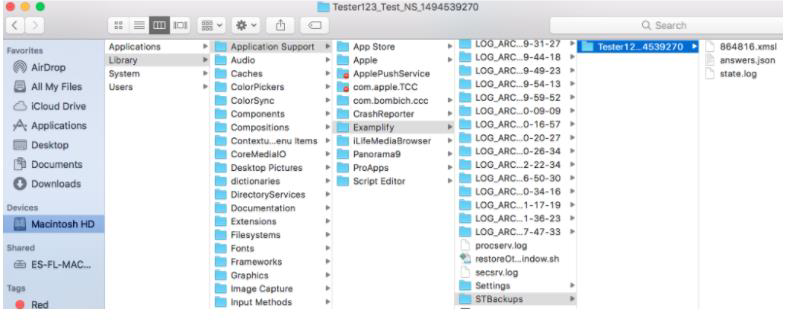
- Click the Upload button to submit the file.
If you lot are unable to locate the answer file within the STBackups folder, please be sure to check the post-obit binder path for not-uploaded answer files: Library\Application Back up\Examplify\Client ID\Student ID\AnswerBundle\Exam Posting ID
The Customer ID is generally three to four digits. The Exam Posting ID will be six digits.
If yous are unable to find an answer file, please contact AskOtago for assist:
Freephone 0800 fourscore eighty 98 (within New Zealand)
Tel +64 iii 479 7000
E-mail university@otago.ac.nz
Further information
Otago weblog: ExamSoft Digital Exams
Source: http://otago.custhelp.com/app/answers/detail/a_id/3198/~/uploading-examplify-digital-assessment%2Fexam
Posted by: murdockbeinerculd.blogspot.com
0 Response to "What Happens When You Do Not Upload A File In Time On Examsoft"
Post a Comment